Khanh Hoang - Kenn
Kenn is a user experience designer and front end developer who enjoys creating beautiful and usable web and mobile experiences.
A common scenario that Drupal developers and site builders run into is the challenge of keeping the database in sync between the dev, testing and production versions of a site. Web hosts like Pantheon (highly recommended) make this a snap, but what if you're using a VPS or some other hosting that doesn't have that functionality? One popular option is to use Drush, but that isn't a good fit for everyone.
Backup and Migrate (BaM) can be a great tool for helping with this sort of problem. In this post we'll talk about using BaM for this task and include a very handy companion service that makes things even easier. What I often see with site builders who are using Backup and Migrate is the manual downloading of backup files and then doing a manual restore from the downloaded file.
A great alternative to that process is setting up an Amazon S3 bucket (cloud storage) where you can directly place your backups from Backup and Migrate. Once each version of the site has the S3 bucket set up, keeping the database in sync becomes a snap.
Setting up an account with Amazon Web Services is free - you get 5 GB of Amazon S3 storage, 20,000 get requests, 2,000 put requests, and 15GB of data transfer each month for one year with the free account. If you start to use the service more heavily, you pay for what you use, but for most dev scenarios, you probably won't incur fees.
Amazon has a nice tutorial to walk you through the process of getting started with the service.
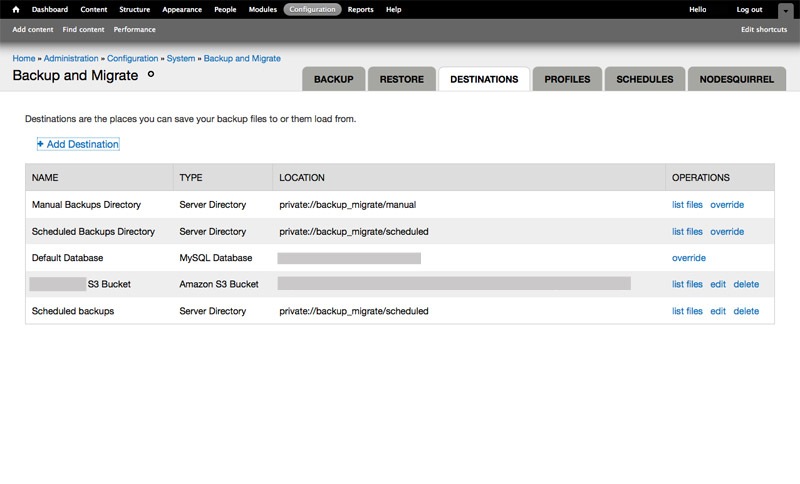
Once you have an account with AWS, you head back to Backup and Migrate on your Drupal site - /admin/config/system/backup_migrate. Go to the Destinations tab and you'll see an 'Add Destination' link as in the image below. Click that link and in the list on the next page, select 'Amazon S3 Bucket' as the destination.

You'll most likely be prompted to add a PHP library - simply follow the link provided in the prompt and download the library to the 'libraries' folder of your site. It's really easy, so don't be put off.
The next step is to fill in the form you see below with the information from your S3 bucket.

That's pretty much all there is to it. Make sure everything is working by running a manual backup to the new S3 bucket destination. A good next step is to configure scheduled backups on the target machine so you can periodically restore a fresh copy on your other environment(s).
To restore your database from the S3 bucket in the UI, you just go to the 'Destination' you have configured in Backup and Migrate for the bucket and click the 'restore' link next to the copy you want to use. A nice twist is using Drush to help with some of this.
If you're brand new to Drush but would like to learn, here's a good place to start. If you'd just like to know how to use Drush and Backup and Migrate together, here's a good tutorial on that topic.
If you have any comments on this post, you may politely leave them below.