Cách Send Follow-Up Emails sử dụng Rules Scheduler in Drupal 7

- Posted by: Bui Thi Thu Lai
- Thu, 9/01/2014, 17:29 (GMT+7)
- 0 Bình luận
Cách Send Follow-Up Emails sử dụng Rules Scheduler in Drupal 7
On a community website, it's a good idea to send some type of follow-up email a week or month after a user registers. This email can be used to ask for feedback or promote useful features.
This type of functionality can be built in a few ways. You could use a 3rd party email service like MailChimp or AWeber to send the follow-up as an auto-responder.
Another possibility, is to send the follow-up email directly from Drupal.
In this tutorial, I'll show you how to use Rules Scheduler (part of Rules) to send a follow-up email one week after a user registers.
Now, every website is different and you may want to send this email after three days or one month. By using Rules, you can adjust this type of configuration directly from Drupal without writing any custom code.
We'll create a basic rule that will need to be adjusted to suit your website. Use it as an example and remember don't spam your users.
Simplenews is a powerful module that allows you to send newsletters directly from Drupal. If you need this type of functionality, then give it a try.
Getting Started
Head over to drupal.org and download Rules, Entity API, Views and Ctools. Once downloaded, enable Rules UI, Rules Scheduler and Views UI.
If you use Drush, run the following commands:
drush dl rules entity views ctools
drush en rules_admin rules_scheduler views_ui
How it Works
The functionality is split in two parts: a component and a rule.
We'll create a rule called "Schedule follow-up email" that schedules the component to be executed one week from when a user registers.
The component, which we'll call "Send follow-up email", will be used to send the actual email. If you've never played around with Rules Scheduler, this concept is hard to understand until you see it in action.
Now, for Rules Scheduler to work you'll need to make sure cron is running. If you're having trouble with components not being executed, then check the "Recent log messages" and see if it's an issue with cron.
For a great introduction into Rules Scheduler, I recommend that you watch the video: "Introducing Rules Scheduler".
Create Component
1. Go to Configuration, Rules, Components and click on "Add new component".

2. Select "Action set" from the "Component plugin" drop-down list and click on Continue.

3. Enter "Send follow-up email" into the Name field.
4. In the Variables section, select User from the "Data type" drop-down list, then enter User into Label and enter userinto Machine name.

Once you've filled out the form click on Continue.
At this point, we have an empty component with the User entity type passing through it as a variable. Now, all we need to do is create an action that sends the follow-up email.
5. Click on "Add action" and select "Send mail".
6. In the To section, click on the "Switch to data selection" button so we can use a data selector instead of a token.

Then click on the selector and select user:mail.

Go ahead and fill out the Subject and Message text area then click on Save.
All we have done so far is create a component called "Send follow-up email" with a single action that sends the email.

Create Rule
As mentioned earlier, the functionality is split up in two parts: a component and a rule.
We've already created the component that will send the email, now let's create the rule that will schedule the component.
1. Go to Configuration, Rules and click on "Add new rule".
2. Enter "Schedule follow-up email" into the Name field and select "After saving a new user account" from the "React on event" drop-down list. Then click on Save.

3. Click on "Add action" and select "Schedule component evaluation" from the "Select the action to add" drop-down list.

If you can't see this action then make sure you've enabled the Rules Scheduler sub-module.
4. Select the "Send follow-up email" component from the Component field-set and click on Continue.

5. From the "Scheduled evaluation date" field-set, you can define which date the component will be evaluated on.
For our setup, just enter in +1 week. This means it'll run one week from today.

5. In the Identifier field-set, you need to add a string that uniquely identifies this task.
Enter in Follow-up email for [account:uid] into the Value field.

6. And finally, in the User field-set select account from the Data selector.

Once you've selected an account, click on Save.
Test Follow-Up Email
Now that we have everything setup, let's test and make sure it's working.
Go ahead and register a new user account on your Drupal site. Once registered, go to Configuration, Rules and click on the Schedule tab.
You should see a scheduled task with the identifier Follow-up email for X. X being the User ID.

Once the scheduled date has passed, the component will execute and a follow-up email will be sent.
If you see a message that says "To display scheduled tasks you have to install the Views module.", then make sure you enable the Views module. The Schedule page uses Views to display tasks.

FAQ
Here's a FAQ list on a few possible problems and how to investigate them.
Q: Emails are not being sent.
First make sure your Drupal site has been set up to send emails. This can be achieved by setting up a mail server or by using a 3rd party SMTP provider.
To see if Rules has sent an email, go to Reports and the "Recent log messages" page and look for a message: "Successfully sent email to [email protected]". If you can see this message, then Rules sent the email, but you still need to make sure you've configured your server to send emails.
Lastly, check your spam folder. Often emails that are sent from test servers end up in the spam folder.
Q: I can't see any tasks on the Schedule page.
First of all make sure you've installed Views. The Schedule page uses the module to display all tasks.
Second, make sure you've added the "Schedule component evaluation" action to schedule the component. Without this action tasks will not be created.
Q: How do I send HTML emails?
The "Send mail" action used in the component only sends plain text emails. If you want to send HTML emails, then look at using Mime Mail. This module comes with an action called "Send HTML e-mail" which can be used to send emails as HTML.
Conclusion
I hope you now have a better understanding about Rules Scheduler and how to use it. Not only can it be used to fire off emails, you can use it to remove roles or remove comment access.
If you need to automate and schedule the execution of a component, then Rules Scheduler is the right module for the job.
Bạn thấy bài viết này như thế nào?:

Tìm kiếm bất động sản
Advertisement
![]()


Quảng Cáo Bài Viết
")
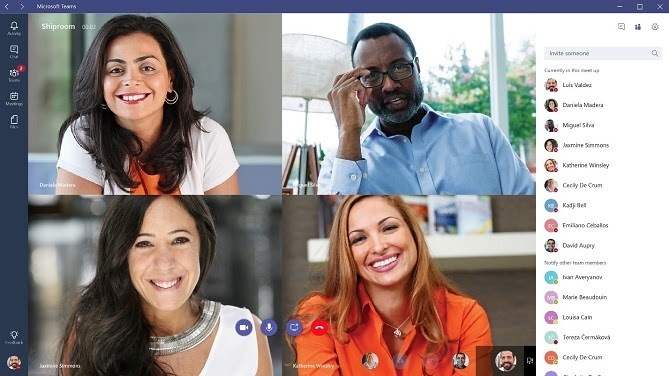
Những phần mềm họp trực tuyến thay thế Zoom bảo mật hơn là Hangout Meets
Các dạng Video Conference như Cisco Webex, Microsoft Teams, Google Hangout Meets... bảo mật hơn Zoom, lại hỗ trợ họp đông người, tính ổn định cao.

Lợi ích đem lại từ Rich Snippets
Chắc hẳn bạn đã từng thấy một số kết quả tìm kiểm hiển thị trên Google được gắn sao khi bạn tìm kiếm với từ khóa nào đó? Đó chính là Rich Snippets. Ở bài viết này chúng tôi sẽ giới thiệu về Rich Snippets và những lợi ích mà nó đem lại.

Tổng hợp các modules tốt nhất ở Drupal 7 - Final Edition
A great list from Mediacurrent's Jay Callicott of his most often used modules.
Monthly archive
- October 2011 (1)
- November 2011 (300)
- December 2011 (242)
- January 2012 (85)
- February 2012 (64)
- March 2012 (55)
- April 2012 (24)
- May 2012 (26)
- June 2012 (53)
- July 2012 (128)
- August 2012 (135)
- September 2012 (27)
- October 2012 (60)
- November 2012 (95)
- December 2012 (161)
Công ty diệt chuột T&C

Hóa học & Sinh học
-
 15/02/2023
 -
15/02/2023
-
15/02/2023
-
15/02/2023
-
15/02/2023
-
15/02/2023


")


C/C++


Database


Donate


