Bootstrap is a mobile first front-end framework that allows a developer to build websites quickly. The framework comes with a lot of reusable CSS styles, components and jQuery plugins.
One thing I like about Bootstrap is its CSS styles and components. You get access to all sorts of useful things like Tables, Thumbnails and more.
Now, implementing these components in Drupal can be tough. You can either change Drupal's markup or use Mixins.
But there is a module that can help you display components (and some plugins) within a View; and it's called Views Bootstrap.
The module allows you to use components and CSS styles directly from the Views edit page without overriding templates or creating mixins.

In this tutorial, I'll show you how to create a "Recent articles" block using Views and the Media object component.
Getting Started
For this tutorial, I'll assume you already configured the Bootstrap theme and jQuery Update.
So before we begin, go download and install Views Bootstrap, Views and Ctools.
As of this writing, the Media object component is only available in the development release (7.x-3.x-dev) of the module. So make sure you use the latest development version.
If you use Drush, run the following command:
drush dl views_bootstrap-7.x-3.x-dev views ctools
Create View Listing
1. Go to Structure, Views and click on "Add new view".
2. Fill out the "Add new view" form, using the values defined in Table 1.0 and click on "Continue & edit".
Table 1-0. Create a new view
|
Option |
Value |
|---|
|
View name |
Recent articles |
|
Machine name |
recent_articles |
|
Show |
Content type of Article |
|
Create a page |
Unchecked |
|
Create a block |
Checked |
|
Block title |
Recent articles |
We'll use the Media object component to display a list of articles. This component is comprised of three parts: image, title and body.

So the first thing we need to do is add those three fields to the view. Title field has already been added, it's the default field that is added to all new views. This just leaves the Image and Body field.
3. Click on Add in the Fields area and select "Content: Image".
4. Select "Thumbnail (100x100)" from the "Image style" drop-down list and Content from the "Link image to" drop-down list.

Then click on Apply.
5. Click on Add again, and this time select "Content: Body".
We won't display the whole body field; just a trimmed version. Select "Trimmed" from the Formatter drop-down list and enter 200 in the "Trim length" text field. Then click on Apply.

Now we have all the required fields, the last thing we need to do is change the Format from "Unformatted list" to "Bootstrap Media Object".
6. Click on "Unformatted list" in the Format area and select "Bootstrap Media Object" then click on Apply.
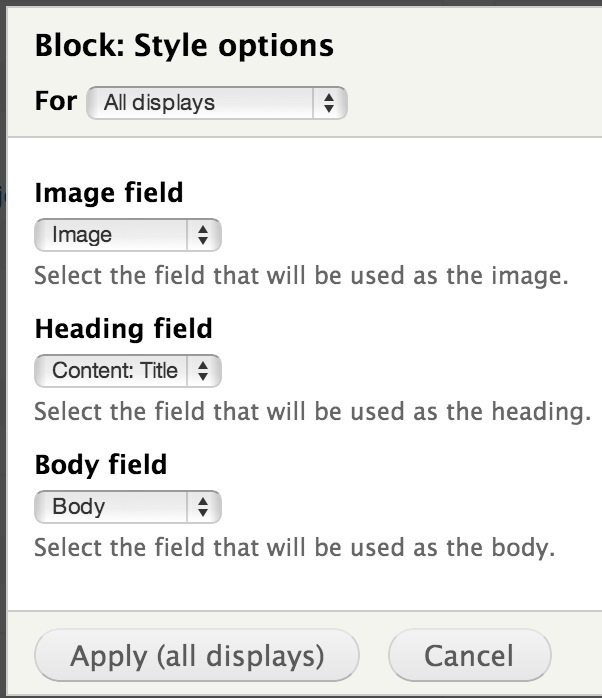
In the "Image field" drop-down list select Image, from the "Heading field" drop-down list select "Content: Title" and from the "Body field" drop-down list select Body. Then click on Apply.
If you can't see "Bootstrap Media Object", then make sure you've downloaded the latest development version of the module.

Finally, make sure you save the view.
Add Block to Region
Now that the block has been created, let's add it to a region.
1. Go to Structure and click on Blocks.
2. Assign "View: Recent articles" block to the Primary region and then click on "Save blocks".
Go to the homepage and you should see the "Recent articles" block displayed on the left using the Media object component.

Summary
Bootstrap is powerful, but implementing it in Drupal can be difficult. Thanks to modules like Views Bootstrap, it's relatively easy to use components in Drupal.
Also, if you use Panels or Display Suite, you should check out Display Suite Bootstrap Layouts and Panels Bootstrap Layouts. Both modules make it easy to implement Bootstrap's grid system with Drupal.


