Having the ability to send a targeted email to all purchasers of ‘product X’ can be priceless.
Think of these example scenarios in case of physical products:
-
you have a great upsell for the product they bought
-
a newer version of the product they bought is released
-
you want to ask people to return the product because it’s defective
-
You want to send a photo of a cat to all customers that purchased a product from your cats product ‘cat’egory
-
Asking your customer how they like the product 2 weeks after they bought it
or in the case when a product is a digital elearning course:
-
Your customers receive weekly emails regarding that weeks lesson from the course they bought.
In all these cases segmenting your list means having the ability to send more targeted emails. The more targeted an email is generally means an increase in chance of you sending a message that actually helps those customers. And because being able to help your customers in general means that you make more money, let's have a look at how you can send a targeted email to all purchasers of one certain Drupal Commerce product.
How it’s made
Let’s see how that works in Drupal. I’m assuming:
You have a Drupal Commerce store
In this tutorial I will be talking about the Drupal Commerce based scenario. You can easily install a Drupal Commerce store with my basic guide on how to work with Commerce Kickstart. Commerce Kickstart allows you to install a fully functional Drupal Commerce store from scratch.
You configured MailChimp module
I'm assuming you're using MailChimp and configured MailChimp module on your Drupal site. If not, have a look at this tutorial on how to configure MailChimp module for Drupal the right way.
You configured Commerce MailChimp module
Drupal Commerce needs to send its order data to your MailChimp list. Learn how to set that up in this tutorial on how to connect Drupal Commerce to MailChimps eCommerce360.
Segmenting based on Drupal Commerce Product
By default segmentation based on product is working out of the box once you’ve setup all the above items correctly. Place a few orders in your Drupal Commerce store. Make sure the email address you’re testing with is on the MailChimp list or make sure to check the ‘Signup to newsletter box’ in those orders. Learn about how to setup a ‘signup during checkout’ pane in this tutorial that shows you how to configure that.
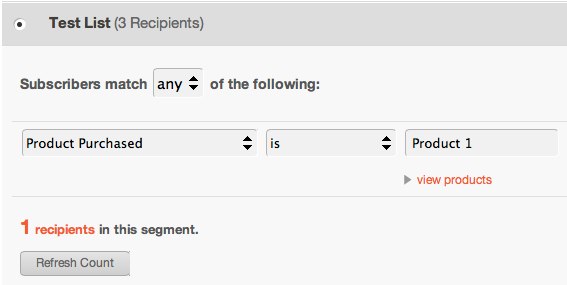
In MailChimp, create a campaign and click ‘Sent to Segment’. Select ‘Product Purchased’ from the list and you should be able to select the products that you’ve ordered in those test orders you’ve made.

Learn more on how to segment your list from the MailChimp side of things in the tutorial about MailChimp list segmenting based on purchase activity.
Make sure you’ve entered a unique Drupal Commerce product name for each of your products on the product level (and not just for your product displays).
Segmenting based on Drupal Commerce Product Category
To be able to segment your MailChimp list based on product category data you have to place every Drupal Commerce Product into a category. In Drupal Commerce separates products from product displays. Make sure you know the difference between the two, or educate yourself with this guide on Drupal Commerce product displays.
Make sure you understand how MailChimp segmenting works on the MailChimp side of things: it will help you to understand what you’re doing at the Drupal side of things. (MailChimp segmenting tutorial)
Create the Vocabulary
If you haven’t done so yet, add a vocabulary at example.com/admin/structure/taxonomy and add a few terms to it. In this example I’ve created the Vocabulary ‘MailChimp Product Category’ and added 3 terms to it: ‘cat’, ‘dog’ and ‘chimp’.
Create and configure the Term Reference Field
The second step is to add a Term Reference Field to the product content type. It will reference a term from your Vocabulary. To do this go to example.com/admin/commerce/config/productvariationtypes and manage the fields of the product you want to add the Term Reference Field to. You’ll see a screen with options like below:
For this example I named it ‘MailChimp Product Category’. Select ‘Term reference’ as Field Type. Press the ‘save button’.
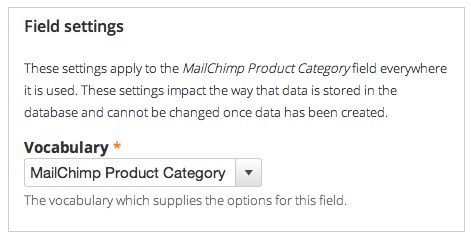
At the next screen select the Vocabulary you like to use, in my example that’s ‘MailChimp Product Category’
Click ‘Save field settings’.
At the next screen leaving everything to default is ok. Save settings.
A little note on using multiple values for this field: setting ‘Number of values’ to 2 or more will work, but only the first term will be sent to MailChimp when a product is categorized into 2 or more categories.
Multiple product types
If you have multiple product types for which you like to send the category data to MailChimp: use ‘Add existing field’ for the other product types.
Manage Display
If you want to hide the ‘MailChimp product category’ for your customers, go to the ‘Manage Display’ tab and move the field to the ‘Hidden’ section.
Categorize the Products
Now go to example.com/admin/commerce/products. This shows you a list of products. Edit the products to put them in a category. In case you have a Commerce Kickstart installation: this url will now technically list Display products. Edit them and you can access & edit the products.
Again be aware of the fact that MailChimp only supports one category term per product. Selecting multiple Taxonomy Terms for a product is possible from within Drupal, but only the first will be sent to MailChimp.
Select what Term Reference Field to use for MailChimp
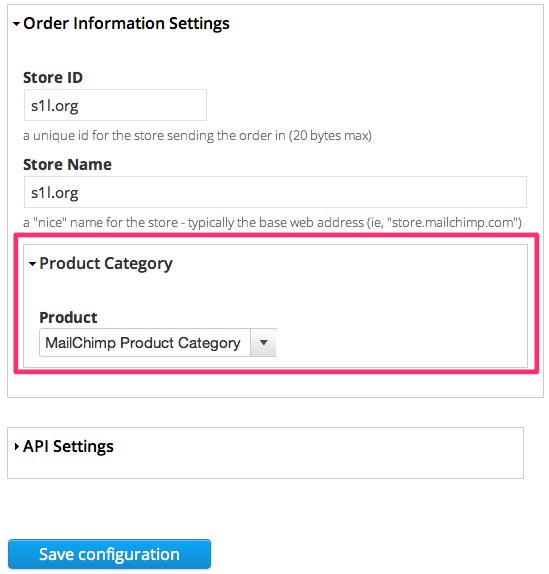
Now that you’ve created the Vocabulary and assigned a term to each product, you have to select the category is going to be sent to MailChimp along with the other eCommerce data.
In Drupal that means selecting the right Term Reference Field in the Commerce MailChimp settings at example.com/admin/commerce/config/mailchimp
Don't forget to save.
Now make a couple of test product purchases, and create a segmented MailChimp campaign based on product category: the categories of the product purchases you made should show up.


")


