>>Phần 1: Ví dụ mẫu .Net Remoting & Windows Services
Bước 1: Tạo project Windows Services

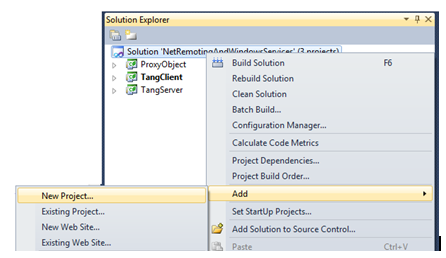
Tương tự như khi tạo các tầng trước, bạn bấm chuột phải vào solution/ Add/ New Project.
Chọn Windows Service, nhập tên project là: MyPrimeServices rồi click Ok, sau khi click ok bạn quan sát sự thay đổi trong Solution:
Bạn double click vào tập tin Service1.cs (tập tin này mặc định được tạo ra cùng với project). Sau khi double click, cửa sổ Design màu xám của Services1.cs sẽ được hiển thị ra, bạn click chuột vào vùng xám (không phải double click, tức là chỉ click chuột 1 lần)
Sau khi click chuột vào vùng xám, bạn đổi tên (Name) từ Service1 thành MyPrimeServices8998 như hình trên, 8998 ý tôi muốn ghi gợi nhớ là tôi muốn tạo services chạy ở cổng 8998.
Bây giờ ta tiến hành viết code cho class services của mình. Trong vùng design màu xám, bạn click vào dòng chữ “Click here to switch to code view” hoặc nhấn phím F7.
Mặc định ta sẽ có class như bên dưới:
using System;using System.Collections.Generic;

using System.ComponentModel;

using System.Data;using System.Diagnostics;

using System.Linq;

using System.ServiceProcess;

using System.Text;

namespace MyPrimeServices

{

public partial class MyPrimeServices8998 : ServiceBase

{

public MyPrimeServices8998()

{

InitializeComponent();

}

protected override void OnStart(string[] args)

{

}

protected override void OnStop()

{

}

}

}
Hàm OnStart và OnStop tự động phát sinh trong class MyPrimeServices8998 , class này sẽ được kế thừa từ ServiceBase . Bạn có thể override thêm nhiều phương thức như bên dưới để phục vụ một số yêu cầu mà bạn mong muốn, còn không thì cứ để mặc định 2 hàm trên:
protected override void OnContinue(){base.OnContinue();}protected override void OnPause()

{

base.OnPause();

}

protected override void OnShutdown()

{

base.OnShutdown();

}
Tôi sửa lại class MyPrimeServices8998 này như sau: Tôi sẽ thêm 2 hàm myServerStart()
Và myServerStop() . Trong hàm myServerStart() bạn chỉ cần copy paste toàn bộ code trong button Khởi động của tầng server vào đây. Tương tự myServerStop() bạn copy paste code trong button Tắt vào. Các bạn chú ý là chúng ta cũng phải tham chiếu tới tầng ProxyObject và thư việnSystem.Runtime.Remoting, các bạn xem code Tôi chép:
using System;using System.Collections.Generic;

using System.ComponentModel;

using System.Data;

using System.Diagnostics;

using System.Linq;

using System.ServiceProcess;

using System.Text;

using System.Runtime.Remoting;

using System.Runtime.Remoting.Channels;

using System.Runtime.Remoting.Channels.Tcp;

using ProxyObject;

namespace MyPrimeServices

{

public partial class MyPrimeServices8998 : ServiceBase

{

private TcpChannel tcpChannel = null;

private int port = 8998;

private Type type;

private WellKnownObjectMode wellKnownMode;

private string objURI;

public MyPrimeServices8998()

{

InitializeComponent();

}

private void myServerStart()

{

try

{

myServerStop();

//tạo kênh truyền dữ liệu

tcpChannel = new TcpChannel(port);

ChannelServices.RegisterChannel(tcpChannel, false);

//đăng ký remote object với Remoting framework

type = typeof(PrimeProxy);

objURI = “PRIME_URI”;

wellKnownMode = WellKnownObjectMode.Singleton;

RemotingConfiguration.RegisterWellKnownServiceType(type, objURI, wellKnownMode);

}

catch (Exception ex)

{

}

}

private void myServerStop()

{

if (ChannelServices.GetChannel(“tcp”) != null)

{

ChannelServices.UnregisterChannel(tcpChannel);

}

}

protected override void OnStart(string[] args)

{

myServerStart();

}

protected override void OnStop()

{

myServerStop();

}

}

}
Ở đây mặc định là chạy port 8998, và SingleTon. Một vấn đề nảy sinh là làm sao chúng ta biết được service của mình Start khi nào, Stop khi nào và các lỗi sảy ra thì chúng ta xem ở đâu??? Để làm được điều này, Tôi sẽ hướng dẫn các bạn sử dụng component Eventlog.
Bạn tìm tới EventLog trong danh mục Components, kéo thả control này vào vùng Design màu xám của Service1.cs. Sau đó bạn tiến hành viết code cho eventlog, Tôi sẽ hướng dẫn các bạn xem các thông tin Log này trong phần cuối, bây giờ bạn hãy xem code hoàn chỉnh mà Tôi cung cấp:
using System;using System.Collections.Generic;

using System.ComponentModel;

using System.Data;

using System.Diagnostics;

using System.Linq;

using System.ServiceProcess;

using System.Text;

using System.Runtime.Remoting;

using System.Runtime.Remoting.Channels;

using System.Runtime.Remoting.Channels.Tcp;

using ProxyObject;

namespace MyPrimeServices

{

public partial class MyPrimeServices8998 : ServiceBase

{

private TcpChannel tcpChannel = null;

private int port = 8998;

private Type type;

private WellKnownObjectMode wellKnownMode;

private string objURI;

public MyPrimeServices8998()

{

InitializeComponent();

if (System.Diagnostics.EventLog.SourceExists(“PRIME8998″) == false)

{

System.Diagnostics.EventLog.CreateEventSource(“PRIME8998″, “LOG8998″);

}

eventLog1.Source = “PRIME8998″;

eventLog1.Log = “LOG8998″;

}

private void myServerStart()

{

try

{

myServerStop();

//tạo kênh truyền dữ liệu

tcpChannel = new TcpChannel(port);

ChannelServices.RegisterChannel(tcpChannel, false);

//đăng ký remote object với Remoting framework

type = typeof(PrimeProxy);

objURI = “PRIME_URI”;

wellKnownMode = WellKnownObjectMode.Singleton;

RemotingConfiguration.RegisterWellKnownServiceType(type, objURI, wellKnownMode);

eventLog1.WriteEntry(“khởi động server tại port ” + port.ToString() + ” lúc ” + DateTime.Now.ToString());

}

catch (Exception ex)

{

eventLog1.WriteEntry(“Lỗi : ” + ex.Message);

}

}

private void myServerStop()

{

try

{

if (ChannelServices.GetChannel(“tcp”) != null)

{

ChannelServices.UnregisterChannel(tcpChannel);

eventLog1.WriteEntry(“tắt server tại port ” + port.ToString() + ” lúc ” + DateTime.Now.ToString());

}

}

catch (Exception ex)

{

eventLog1.WriteEntry(“Lỗi : ” + ex.Message);

}

}

protected override void OnStart(string[] args)

{

myServerStart();

}

protected override void OnStop()

{

myServerStop();

}

}

}
Như vậy bạn đã hoàn thành xong class service MyPrimeServices8998
Tiếp theo ta tiến hành Add Installer cho Services, bằng cách bấm chuột phải vào vùng xám, chọn Add Installer
Chương trình sẽ tự động add thêm tập tin ProjectInstaller.cs, trong tập tin này cũng tự động chứa serviceInstaller1 và serviceProcessInstaller1 như hình bên dưới:
Chỉnh sửa serviceProcessInstaller1:
Sửa Account thành: LocalSystem
Chỉnh sửa serviceInstaller1:
Sửa ServiceName thành : MyPrimeServices8998
Sửa StartType thành: Automatic
Sau khi chỉnh sửa xong, bạn tiến hành Build project MyPrimeServices.
Bước 2: Tạo project Setup cho bước 1
Tương tự như các tầng khác, bạn cũng tạo 1 project mới và chọn là Setup Project trong mục Setup and Deployment/ Visual Studio Installer
Đặt tên project là : MyPrimeServicesSetup rồi click OK.
Bạn quan sát Solution explorer, chúng ta sẽ thấy tầng MyPrimeServicesSetup xuấn hiện như bên dưới
Để add Project mà bạn muốn cài đặt, bạn click chuột phải vào project MyPrimeService/ chọn Add/ chọn ProjectOutput
Trong cửa sổ Add Project Output Group: bạn chọn MyPrimeServices và Primary output rồi nhấn nút OK.
Sau khi nhấn OK, bạn sẽ được kết quả như bên dưới:
Tiếp tục, bấm chuột phải vào MyPrimeServiceSetup/ View/ Custom Actions
Trong màn hình Design, bạn sẽ thấy như bên dưới:
Tiếp theo bạn bấm chuột phải vào Custom Actions/ chọn Add Custom Actions
Màn hiình Select Item in Project sẽ hiển thị ra như bên dưới
Tại màn hình này, bạn double click vào thư mục Application Folder rồi nhấn OK:
Sau khi nhấn OK, bạn thấy kết quả :
Để hoàn tất quá trình tạo Project Setup, bạn bấm chuột phải vào MyPrimeServicesSetup, chọnBuild/Rebuild:
Sau khi Build thành công thì mục Install và Uninstall sẽ cho phép bạn tương tác:
Bạn chọn Install để tiến hành cài đặt chương trình của mình tự tạo, qua bước 3 để xem chi tiết:
Bước 3: Cài đặt, chạy và kiểm tra services, eventlog
Sau khi chọn Install, màn hình cài đặt sẽ xuất hiện như bên dưới:
Bấm Next để tiếp tục:
Chờ chương trình cài đặt:
Bạn đã cài đặt thành công MyPrimeService. Bây giờ để kiểm tra thực sự Service mà chúng ta tạo đã được tự động cài đặt hay chưa, bạn làm như sau:
Bấm chuột phải vào computer/ chọn Manage
Nếu bạn thấy trong Service có tồn tại MyPrimeServices8998 như hình dưới là thành công
Để xem eventlog mà chúng ta viết coding, thì bạn vào LOG8998 để quan sát:
Như vậy Service của chúng ta đã tự động cài đặt, bạn có thể Start hoặc Stop Service tùy thích bằng cách bấm chuột phải vào Service rồi chọn Start hoặc Stop.
Bây giờ chúng ta chỉ cần chạy mỗi Client mà Thôi. Server đã được Service tự động start rồi. Bạn có thể tiến hành cài đặt Service ở bất kỳ máy chủ nào bằng cách lấy tập tin cài đặt trong tầng Setup cài vào máy chủ mong muốn, sau đó tại các máy client bạn chỉ cần nhập cho đúng IP của máy chủ và port 8998 là mọi việc OK.
Bạn thấy đấy, giờ Tôi chỉ cần chạy Client…


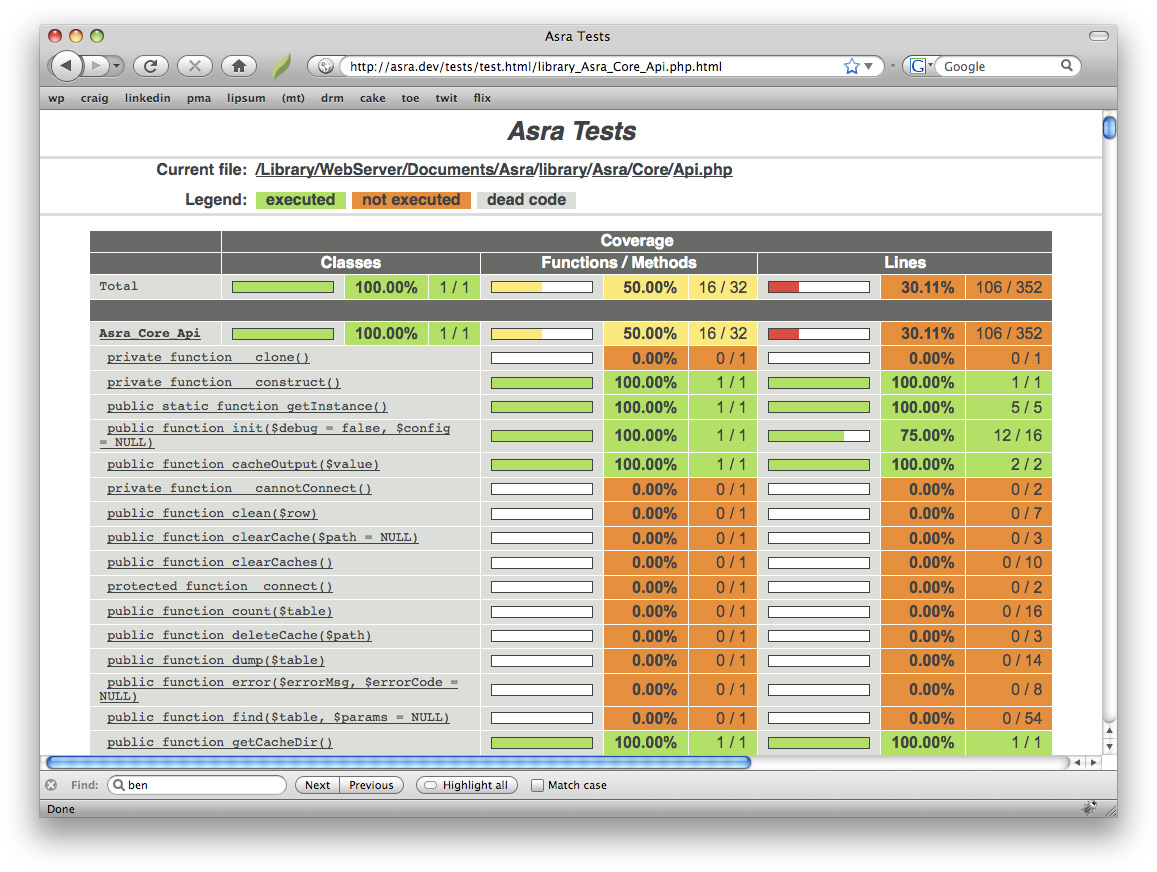
![[Phần 6] - Testing: Unit và Functional với PHPUnit](https://expressmagazine.net/sites/default/files/styles/portfolio/public/imagesArticle/xdebug.jpg?itok=CZjQhnSW "[Phần 6] - Testing: Unit và Functional với PHPUnit")


 = x + x^2 + x^3 + … + x^n")


 là gì, kiến trúc, phân loại?")


